This is an old revision of the document!
Character Sprites and Portraits Editing
Author: madsiur
Last modified: 08/05/2017
Credits: FF6 T-Edition Sprite Tutorial by tsushiy, part of the FF6-T Translation by Kain Stryder.
1. Introduction
The character sprites in FF6 can be modified in various ways depending on exactly what you want to do. Edits like “I want to change Terra's casting pose” or “I want to create an alternate character sprite for Shadow” are possible, but there are elements to consider regarding colors, graphic tiles and animations.
Spriting with FF6's limitations is harder than simply editing a sprite image, but not so far from it when you know and get used to the limitations and specifications. There are three utilities that are made for FF6 sprite work and at least one general GFX utility that can be used to edit sprites and portraits. They will not be covered in-depth here, as they are relatively straightforward when you know the basics (with the possible exception of YY-CHR, which will be covered in depth in a future tutorial).
You'll notice I mainly refer to the generic FF6 name. In this context, FF6 refers to SNES FF3us 1.0 or 1.1, but most of this tutorial can be applied to the GBA versions as well. However, not all differences will be covered or even mentioned. The utilities can only be used with FF3us unless mentioned otherwise. Offsets given are all Hi-ROM offsets.
2. Understanding Sprites
Skip this section if you don't want to read about the technical side of sprites. The rest of this tutorial will refer back to this section, but it will be restated in simpler terms. Don't worry too much if you don't understand this part
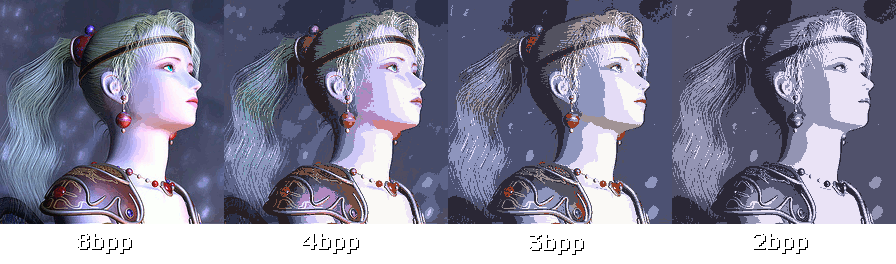
SNES sprites are the combination of two elements: graphic data (GFX) and a palette. The GFX can have a different maximum number of colors, which is called the graphic format. Most SNES graphics are 4bpp (4 bits per pixel), meaning they can have a maximum of 16 colors (transparency color + 15 colors). There are only 16 possible numbers that can be represented with 4 bits (0 to 15). Listed out in binary, these numbers are 0000, 0001, 0010, 0011, 0100, 0101, 0110, 0111, 1000, 1001, 1010, 1011, 1100, 1101, 1110 and 1111. However, there are game GFX that can be 3bpp (8 colors maximum), like some monsters, or 2bpp (4 colors maximum), like the fonts. In the case of 3bpp format, it is always converted by the code to 4bpp because the hardware cannot display it. The 3bpp is a form of compression.
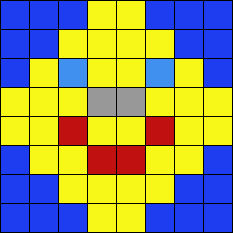
To picture a GFX, imagine (in the case of a 8×8 4bpp graphic) an 8×8 array or table where each pixel is represented by a number from 0 to 15. In a “normal” 4bpp format, one byte (8 bits) would hold 2 pixels represented by 4 bits each, so 2 pixels would fit in one byte. Instead of an array of 64 bytes (which you'd get if your GFX format only stored one pixel in each byte), your GFX would be stored in 32 bytes since 2 pixels fit in one byte. For example, a byte such as 00000010 is the combination of 0000 (0) and 0010 (2). Therefore, this byte contains a pixel of color 0 and a pixel of color 2. This is the logic way and the Bitmap class of Microsoft work this way, as the following image show. Let's take the following tile with the following palette:

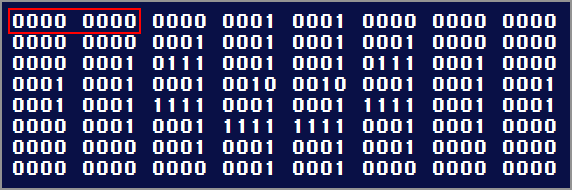
The corresponding array with color IDs is same size except each color is replaced by its palette ID (0x00 to 0x0F):

Normally, in a logic 4bpp format, if we see the same array in color IDs bits now instead of full number (integer or hexadecimal), we should have the following, with one byte being made by two side-by-side pixels:
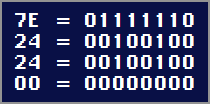
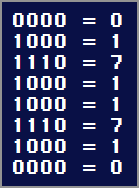
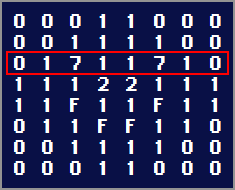
However, bad news! SNES 4bpp format does not work this way. If we take our happy face tile of 64 pixels (8×8) we get the following 32 bytes, as seen in a Hex editor, 2 rows read from left to right:

Each pixel row is 4 bytes as in any other 4bpp format, except you have to read the byte in bitplane to get the color IDs. Each pixel row is represented in the following image. As an example, pixel row 0 is bytes 18 00 00 00:

Bitplanes are read as 1, 2, 3, 4 or top-left, top-right, bottom-left, bottom-right. We will take row 2 to continue the example.


First, you must see each byte in its binary representation. Here the example is symetric but you would usually read from right to left. Each pixel value of the row is represented by the aligned column of those 4 bytes. As an example for first pixel of the row, you read bitplane 1, 2, 3 and 4 which are 0, 0, 0, 0. You color ID is therefore 0000, i.e. palette ID 0.
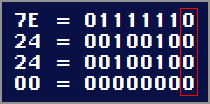
Since there is 8 bit in 1 bytes, the 8×8 tile format take all its sense here. Here are the color values of row 2. As you can see it correspond what is in our previous color array of the tile.
The SNES 4bpp format is not made to be easily humanly readable and was made this way because of the hardware. Don't worry if you struggle with this; this is the detailed technical side and mastering it is not required at all to sprite. Same goes for the coming palette description.
Palettes are a sequence of color data that is “applied” to the GFX. Color 2 of the palette is “applied” to all the pixels of color 2 of the GFX. This method allows us to reuse GFX with different palettes. Palettes are usually 2, 4, 8, 16 or 256 colors (Mode 7), but there is no data in the palette that indicates its length. It is specified in the game code how many palette bytes and GFX bytes to read to correctly display a certain graphic on-screen.
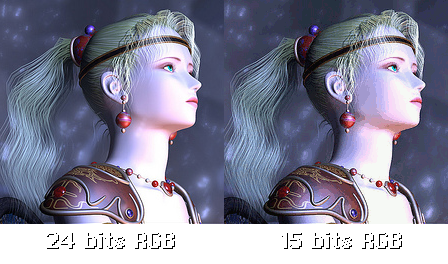
A SNES Color is in 15 bits RGB format. In short, this mean each color can be represented by 2 bytes (16 bits). Each channel value (R, G or B) is 5 bits long, and the first bit is always 0. Specifically, the format is 0BBBBBGG GGGRRRRR. A 5 bit number can be 32 possible values, from 0-31, so there can be 32 different intensities of each of the three primary colors. Considering every combination of red, blue, and green that a single pixel can have, there are 32 767 possible colors on the SNES (32 x 32 x 32). More modern color formats like 24 bit RGB and above (1 byte per channel) have a 0-255 range for each color channel. Translated to 24 bits RGB, a SNES color will always end in 0 or 8. Changing the value of a color by 1 on a 1-31 scale is the same as changing it by 8 on a 0-255 scale. If we use the hex color notation, a valid SNES color expressed in 24 bit RGB could be 18,20,18 (sort of black), but the 24 bit RGB hex color 18,19,18 has no SNES equivalent (0x19 cannot be set on a 0-31 scale because 0x19 is not divisible by 0x08). To be as close as possible, this color should be set as 18,18,18, which is equivalent to 3,3,3 in SNES palette editing programs. Most (if not all) spriting utilities do color rounding for you in order to take free edits in Gimp and such into account, so you don't need to worry about the color rounding at all.
So we know a SNES color fits into 2 bytes; therefore, a 16 color palette takes up 32 bytes of space in the ROM. This is valid for all SNES games. As quickly mentioned previously, transparency is a color because there is no alpha channel in the 15 bits RGB format. The game determines which color is transparent. In the case of FF6, it is always color 0. So this color in the palette will have a RGB value, but it will be masked by the game to show transparency instead.
Here is an example in 5 steps how to convert a color to B,G,R format. We will take our precendent palette of the 4bpp example:

We will take the first color, the medium-dark grey. The steps are inverted 2 bytes value to binary, separation in 3 times 5 bits (1 bit not used) and finally conversion to a decimal value between 0 and 31:


Here are the results for the first 8 colors of our palette in R,G,B format:

This basically covers the technical side of colors, palettes and GFX. Little of what was explained is mandatory to accomplish everyday spriting tasks like editing a sprite in FF3usME, but I think it is good to understand how these elements work on the byte level. If you are using an utility that lets you import images (.png, .bmp, .gif, .jpg, etc.), you should work in an image editor such as Gimp in the “indexed 16 for 4bpp graphic” format. Indexed means that the image data is an array of color IDs as with SNES GFX, and 16 is the maximum number of colors. Depending of what you use, the all purpose image editor may have Indexed format only, so you'll need to set the maximum number of colors yourself. This is always a safer approach than editing an image in 32bpp ARGB format and adding too much colors or even transparency.
3. Editing Tiles (YY-CHR)
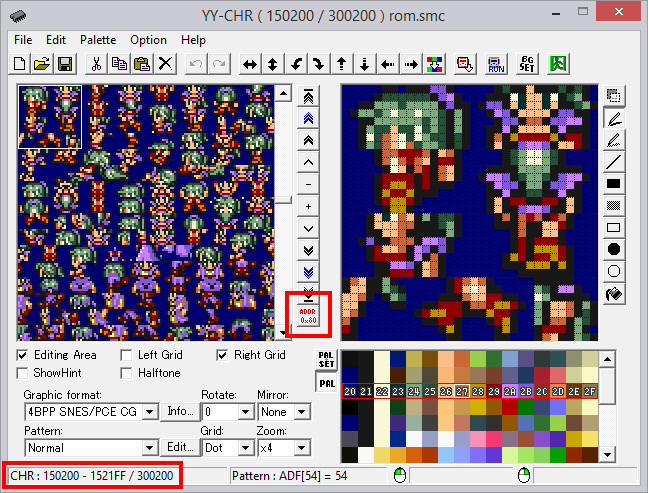
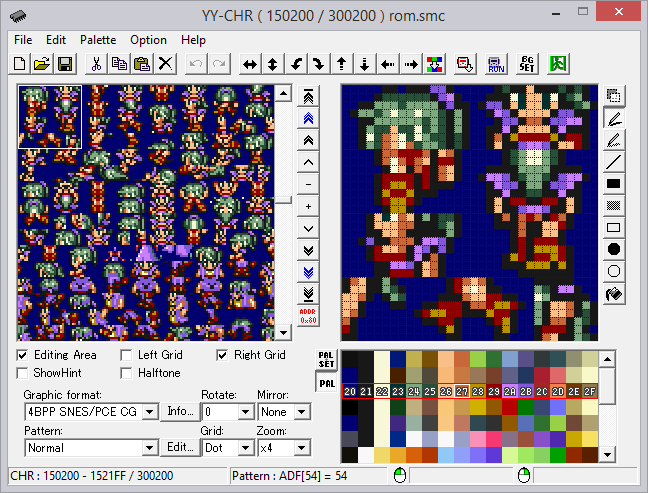
If you wish to do simple tile edits, YY-CHR can be a solution. There is a .NET version and a C++ version. I personally go with the C++ one; it is older, but it has more features that have not yet been ported to the .NET version. The image shown here is from the C++ version.
Character sprite are located at $D50000 ($D50200 with header). You can either enter that address (as $150000 or $150200 if header present) or scroll until you see the GFX tiles. Note that you need to set the graphic format to 4bpp SNES.
If you want the right colors (i.e., the right palette), you can import the FF6 NPC Palettes in YY-CHR by going to Palette → Open Palette (*.pal). This make editing a lot easier, but it is not mandatory. The palette shown in YY-CHR is not the one used by the game, and the GFX is not modified by this step since it uses a palette (see section 2).
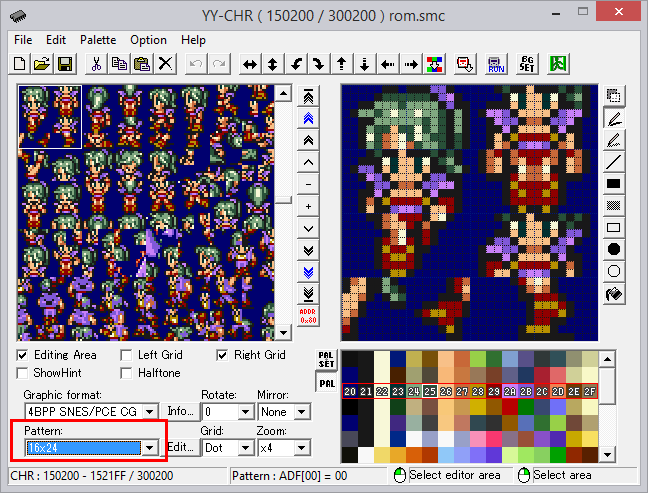
There are several different tile arrangements available. Since we are dealing with 16×24 sprites for characters, a more convenient way to view the tiles would be 16x24. If you had a 32×32 NPC sprite to edit, choosing 32×32 for the tile arrangement would make it easier to edit the tiles. As previously stated, other utilities are more useful than YY-CHR. FF3usME and FF3SpriteEd both have a tile editor (see here and here). FF3SE only allows sprite sheet editing, but it follows the same tile logic when saving the sprite to the ROM.
To summarize this section, YY-CHR can help with basic tasks, but for complex sprite editing, FF3usME, FF3SpriteEd, and FF3SE are more convivial and allow a faster working pace.
4. Editing Sprites
This section will cover the FF6 spriting utilities' features and ways to edit sprites using FF3usME, FF3SpriteEd, or FF3SE.
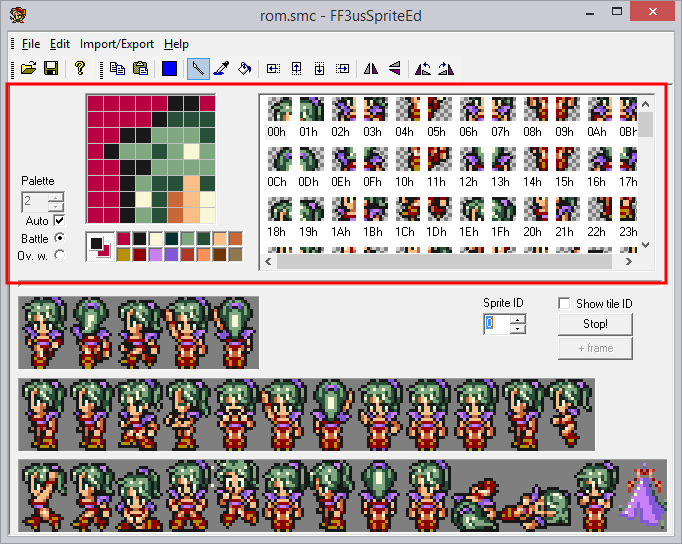
A. FF3SE (no longer developed)
First up is FF3SE, which has no tile editor, but allows sprite sheet editing. Its features are more basic than FF3usME or FF3SpriteEd. This can be more difficult to work with if you are a novice and don't know which tiles repeat. Also, there is no way to animate the sprite to see if your work is correct or should be adjusted. Note that there is a “trick” to importing a sprite with the correct palette order every time. You simply have to draw your palette on first pixel row as shown here. This “trick” can be used in FF3usME, FF3SpriteEd, or any editor that determines the palette by scanning the image from the top-left to the bottom-right.
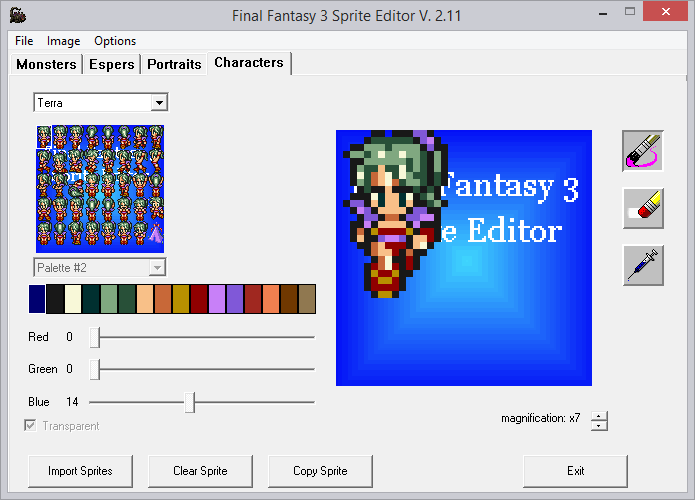
B. FF3SpriteEd (merged with FF3usME)
Second comes FF3SpriteEd, the predecessor of the character sprite editor in FF3usME. They are somewhat similar to each other. Without detailing everything, one of the major differences is that the binary import / export for the tileset can be done separately from the import / export for the palette (.pal). The advantage of importing in this manner is that you can apply a new palette to the tileset in a single click. However, neither the tileset nor the palette can be imported by other programs, making FF3usME's PNG import / export more convenient.
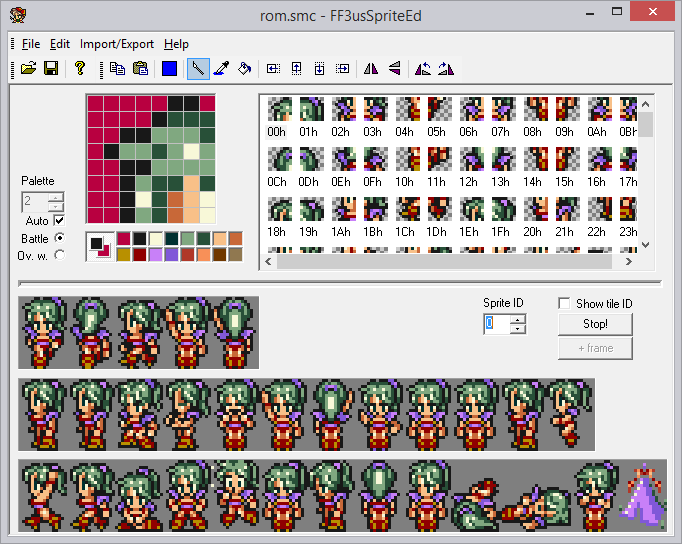
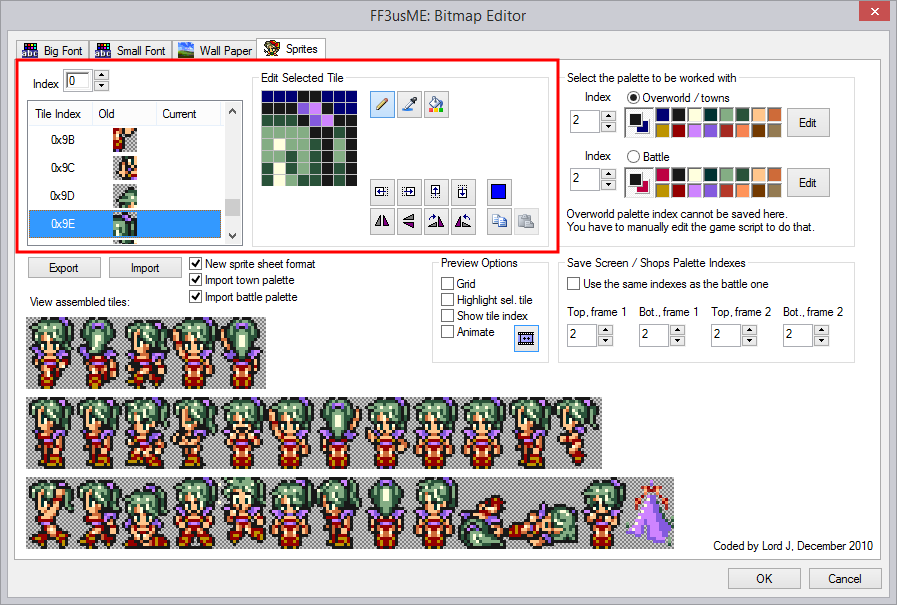
C. FF3usME (still being developed)
Finally, there is FF3usME, which is now at version 6.80. The character sprite editor is a bit more advanced than FF3SpriteEd, and it is able to import / export both PNG files and files produced by FF3SE, making it the editor of choice. All editors are pretty straightforward, so little explanation is required.
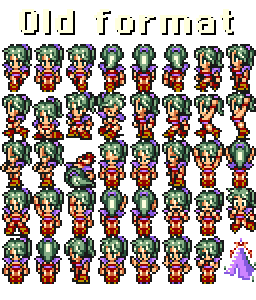
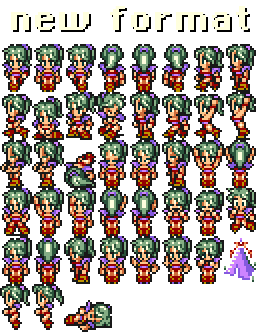
To conclude this section, I'll talk about the spritesheet formats. FF3SE exports the sprite sheet in the old format, meaning they have no “riding” or “dead” (the sideways dead pose used in battle) poses included. This is also the only format it can import. FF3usME uses a similar (but newer) format that includes the dead and riding poses. Lord J's editor can import / export in either the old or new format, making FF3usME more versatile than FF3SE or FF3SpriteEd.
5. Sprite Animations and Poses
Each character sprite in FF3usME consists of 17 sprite animations and 13 static poses, for a total of 46 static poses (~92 if we count flipped poses) and a maximum of 181 different tiles making those poses. Each pose consists of 6 tiles. Many tiles are used in more than one pose, and modifying the tile will affect every pose that uses it. The animations shown in FF3usME are intended to give the spriter a feel for how the different poses look when the character is in motion. For example, several animations show what it looks like when the character is walking. Though there are 17 specific animations shown in FF3usME, the different poses can be strung together in any order in FF6's cutscenes, allowing a much larger number of animations in the game itself. However, the pose and tile counts above are exact.


FF3usME has 2 kind of animation: three pose animations following a 1-2-1-3 pattern and two pose animations following a 1-2 pattern. There are 5 three pose animations and 12 two pose animations. A FF3usME animation table and pose table with corresponding tile IDs (on images) are available:
FF3usME animations table
FF3usME static poses table
For a short description of each pose ID, refer to the movement action codes used in the action queue of characters in the event code.
The possible animations and pose patterns are used mainly in the event code (as well as battle module and world map module). For events, you can call a pose in an action queue of a character or NPC (event commands $00-$35). Walking combinations have their own set of movement actions ($80-$AB). You can call a single pose in an event queue with graphical action $00-$7F. Actions $00-$3F are can be view in FF3usME for the most part and $40-$7F is the horizontal flip of $00-$3F.
There is an “unused” pose on the spritesheet that can be used. Terra is the only one having a valid sprite for it. It's the last pose before the tent in FF3usME, usually filled with the original FF6 spriter signature.
If we come back to spriting, is it important to make sure all the edited poses work correctly with the sprites animations shown in FF3usME. Editing a tile can sometime have an effect on a pose we did not suspected at first glance. Get used to the tile sharing of the sprite poses, that is the same if we look at all sprite sheets of the same size.
6. Editing Palettes
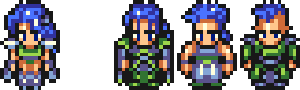
One of the biggest puzzle for those who have sprite with different palette is making sure everything fit together. Why? Because sprite share palettes! As an example, if you change Celes hair color to blue, Sabin, Edgar and Leo's hair will be blue.
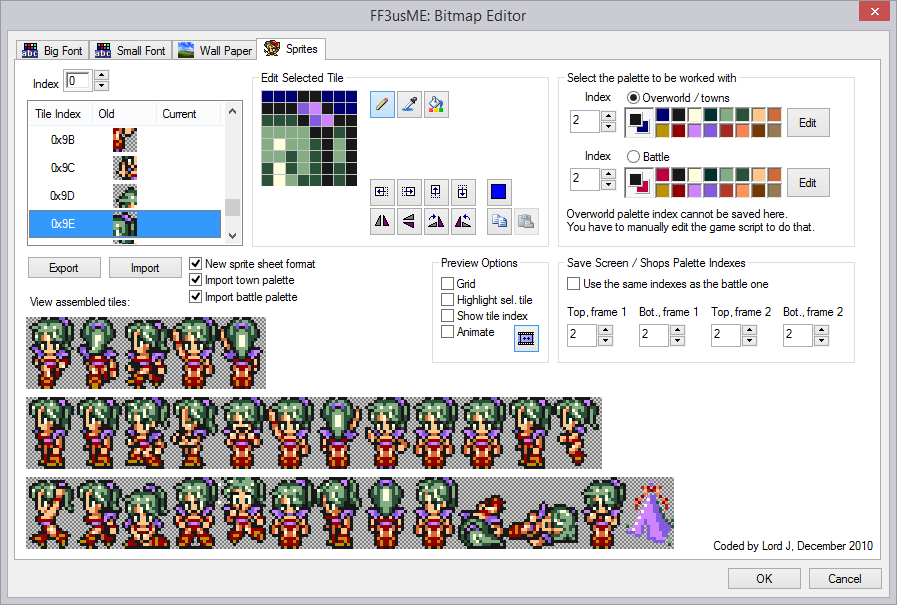
Also there are two 16 colors palettes assigned for each character, one palette for battle and one for maps and overworld. Most of the time they match but they are exceptions. There are 8 battle palettes (located at $ED6300) and 32 overworld palettes (located at $E68000). Here are the first 7 of each type:


They are both assigned in a different way. The battle palette is assigned via a table of 26 one byte entries for the palette ID (14 first entries being the main cast in regular order). This table is located at $C2CE2B. As for the overworld palette it is assigned by event usually when recruiting the character. Map characters are reused, as an example character $07 is first a moogle, then a ghost to finally become Strago. There is many palette assignations needed in a case like this.
This palette and sprite changes document made by runelancer is quite handy to find which event code need to be changed. Check also Lockirby's Event Document for the use of command $43 that change the palette. As an example if you want to set Locke to palette 05, the command would be 43 01 05, because Locke is actor 01.
While there are many overworld palettes all regular characters and character NPCs use a palette ID between 0 and 5, with exception of Esper Terra that use overworld palette 8 and battle palette 6. The reason for you being unable to use 6 and 7 is due to those palettes not being able compatible with save/store/character selection screens. For NPCs, the palette ID is located in the NPC data, it's something that can be edited easily with FF6LE. Here are two tables of the palettes used by the main sprites and main NPCs. Some NPCs can be used with different palettes such as most generic NPCs, however they only appear in the table with their default palette.
Overworld palette
| Palette ID | Sprites using the palette |
| 00 | Edgar, Sabin, Celes, Imp, Leo, Ghost, generic elder, generic man, Maria, Rachel |
| 01 | Locke, Imperial, Merchant, Scholar, Returner, Clyde, generic woman, generic boy, generic girl, Narshe guard, sailor |
| 02 | Terra, waitress, Figaro Sergent, Figaro Guard, Katarin, Darryl |
| 03 | Strago, Relm, Gau, Gogo, Banon, Kefka, Gestahl, Gau (suit), Cid, generic thief |
| 04 | Cyan, Shadow, Setzer, Interceptor, Draco, Arvis, Matron, pigeon, maestro, Maduin, Vargas |
| 05 | Mog, Umaro, Ultros, Chupon |
| 08 | Esper Terra |
Battle Palette
| Palette ID | Sprites using the palette |
| 00 | Edgar, Sabin, Celes, Imp, Leo, Ghost, generic elder, generic man, Interceptor |
| 01 | Locke, Imperial, Merchant |
| 02 | Terra |
| 03 | Strago, Relm, Gau, Gogo, Banon, Kefka, Gestahl |
| 04 | Cyan, Shadow, Setzer |
| 05 | Mog, Umaro |
| 06 | Esper Terra |
Finally when you edit your sprite and colors, there is an order to respect. One of the reason is explained in next section and also why you can only use the first 12 colors for a battle sprite:
| Color ID | Description |
| 00 | transparent |
| 01 | outline (black) |
| 02 | eyes |
| 03 | pupils |
| 04 | hair (lighter shade) |
| 05 | hair (darker shade) |
| 06 | skin (lighter tone) |
| 07 | skin (darker tone) |
| 08 | outfit 1 (lighter shade) |
| 09 | outfit 1 (darker shade) |
| 10 | outfit 2 (lighter shade) |
| 11 | outfit 2 (darker shade) |
7. Other Specifications
A) You can set different sprite for battle and overworld
While the vanilla game has same sprite for battle and NPC or overworld PC, you could set a different sprite for battle. The game get a sprite GFX index for each battle sprite in a pointer table at $C2CE43. Each entry is 3 bytes and there are 24 entries. As for NPCs, this is also in the NPC data which can be edited with FF6LE. Finally playable characters get their GFX set with an event command in the same way the palette is assigned, except it is with event command $37.
B) Color changes in battle
One thing you must keep in mind and be made aware of is battle sprites have color changes during battle. To be more specific, the outer line of characters glows from effects such as Haste, Protect, etc, and their skin tone changes due to Poison, Zombie, etc. These change the colors of the specified number on the palette:

#1 is what's used for the outline of magical effects around the character, and #2 and #3 are what's used for skin color changes like Poison, Zombie, etc. Please note if you use the skin color for clothing or draw black outlines around your eyes, this will make them change color with the above. Personally, I don't think it's super noticeable, so please don't worry too much.
C) Color changes in battle
The total number of colors usable for battle sprites isn't 16 actually, but 12. Out of the 16 colors, 4 are masked via the system colors used (finger cursor, damage font color, etc). Since they do not appear in battle, those last 4 colors can be used for NPCs without worring. There is however a Expanded palette Hack that can make use of those colors and allow you to edit them. The hack does not expand the sprite to have 16 colors but let you choose which of the 12 you want to assign to the sprite.
However using this hack will make characters on palette 4 and 5 display the last 4 colors save/store/character select screens incorrectly. This is due to the last 4 colors of palette 4 being temporarily overwritten by the color of the status ailment on the menu screen and the last 4 colors of palette 5 being used for the color of the cursor.
8. Portraits
Portraits are 40×40 with a palette of 16 colors. Each portrait has its own palette. The easiest way to edit portraits and import custom ones is with FF3SE. Note that the "trick" to have correct import by drawing your palette on the first pixel row also work here. However it is not mandatory but a workaround if you get a bad import.

If you ever edit directly in the ROM with as an example YY-CHR, the tile order is as follow:

9. Conclusion
Becoming a good FF6 spriter require to take a lot in consideration. However many started from nothing and became good with time. It's more a matter of practice and knowing the basics, specifications and exceptions before starting for real. This is what I tried to do with this tutorial. I might revise it a bit but I covered most of the content I wanted to cover.
If you want to read more on the artistic part of Pixel Art, there is a bunch of external tutorial links available on this wiki page. Happy spriting!