Part 26: Ancient Castle & Phoenix Cave
Ancient Castle:
Sitting in Durandal Castle with the team I'm taking into the next dungeon. Golbez obviously because Golbez things, Oboro deserves a chance to show off having just rejoined the party, and most importantly, Eiko's here because she's needed for something very important. Said important thing is the reason I'm only going in with three characters.
Also worth noting...beat up Garuda and get the Time Egg if you haven't done so yet. It'll save you an extra trip later.
Durandal Castle can do its usual dive under the sand shenanigans, but if it's done this time, you're told that the castle hit something and are asked if you want to check out. Say yes, then head to the jail cells to begin exploring the new dungeon.

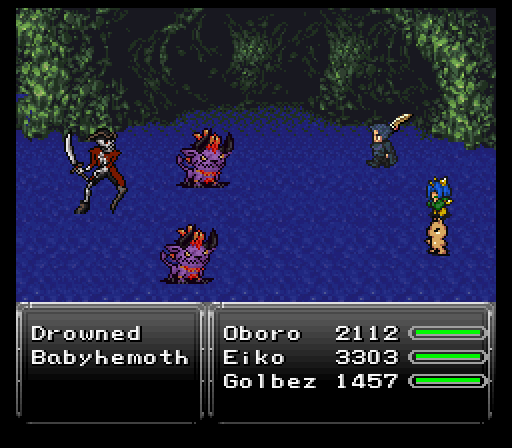
All the battles here take place with the ocean background flag enabled. This means that, should you have missed picking up Mog's water dance due to saving the werewolf thief and taking his Void Stone relic or some other reason, you can pick it up here.
The monsters here are mostly water-based and include:
- Babyhemoth - Don't let their cuteness fool you, they're bad to the bone!
- Drowned - An undead pirate-skeleton with a petrifying-attack.
- Korok - Releases either Cursed Breath or Aqua Breath when last alive.
- Mermaid - An aquatic creature that can use Holy. They can drop Mermaid Rods.
Not much to really say about these caverns besides finding a Naruto Kunai in one of the chests, which is one of the best ranged weapons you can get for Oboro or Arc. The enemies here can be a touch annoying, but not too bad.
As I proceed down the stairs to the save point, it's best to note that I left two chests here. No real reason, I just felt like waiting until I have business done in the actual optional dungeon coming up. There is an optional dragon mulling about the save point area though. I could take it with my trio no problem, but for now I just give it the slip and head on to a familiar place....the Ancient Castle.
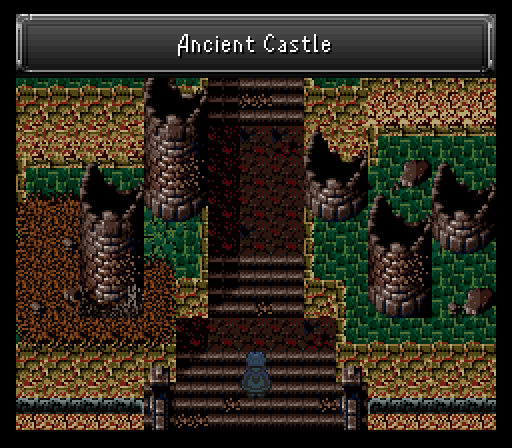
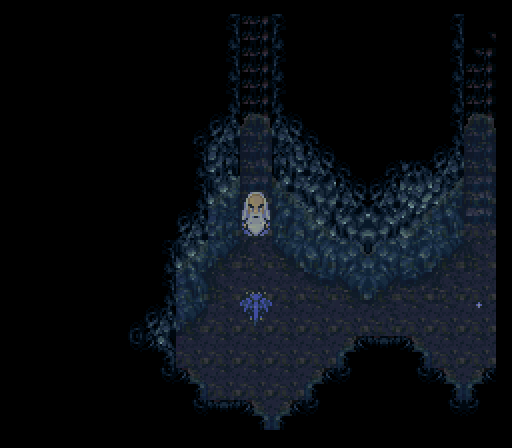
If the castle looks familiar to you, it's because this is the place Zuriel launched an assault with his demon army from the Doom series. Last we had seen from that flashback long ago, he was heading into the room east of the throne room. Probably a good bet everyone hiding down there got killed sadly, given Zuriel's power.
Know who didn't get killed though? The guy waiting just inside the castle entrance, FuSoYa. Eiko's needed to snap him out of his trance.
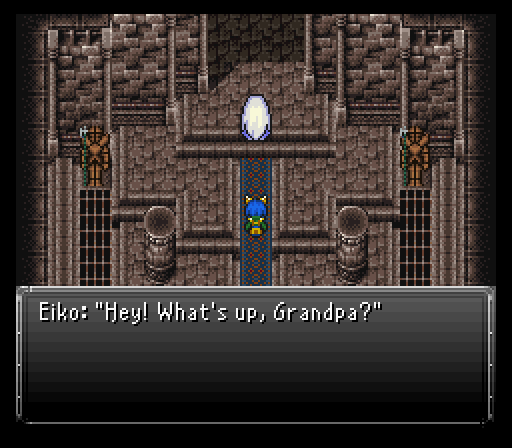
With FuSoYa back in the team, you can very well duck out now if you wanted. Would be a good idea to explore first though and see if there's any loot that can be uncovered.
New enemies in the castle, but only the Mimic Boxes & MK4 Walkers are worth mentioning. The former loves countering any spells you cast at it with the same spell. If you're utilizing a spell that hits everyone like Quake or Flood, make sure your team has the necessary gear to nullify or resist them.
The MK4 Walker is dangerous only because its Magitek Missile can nail a target for 2500 or more damage.
The loot in this place is extremely good and well worth the detour to grab. Take the chest that can be found outside the castle gates and in the room to the east. It contains a new relic, the Wrath Band. It grants +7 to Might and inherent Berserk status, which should help out with those pesky coliseum battles. Just keep in mind that any relic that blocks against berserk will render the Wrath Band ineffective.
Also of note is Odin's prized spear Gungnir in a hidden room to the east of the thrones. No special effects, but it boasts very high attack power, 7 point boosts to stamina & magic, and is a non elemental weapon on top of it.
Speaking of Odin, his magicite is still sitting in the throne room. No harm in us taking it for assistance in the battles ahead. Teaches three spells and all of them (Holy, Arise, Curaga) are very nice to have.

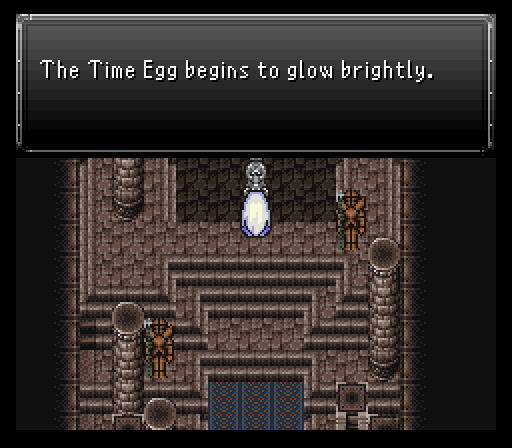
Finally in the throne room, look at the western side of the room. There's a pillar with crossed swords and a statue to its immediate west. If you approach the statue from behind and examine the crossed swords, a staircase opens up in the eastern room. Down those stairs is the queen of the castle. If you have the Time Egg in your possession, her soul will be set free and you'll get a new magicite, Doomtrain. While Death is nothing exciting and new at this point, Meltdown is.
With this, everything's looted from the castle so I head back to the save point in the caverns, then go get the two chests I passed up. One has our old buddy Master Tonberry. Besides a fight that lasted longer than it should have because I was bull headed enough to try stealing its Omni Elixir (failed, heh), the other chest has a Speed Tab.
Only one more thing to do in these caverns!
Aquestos:
Almost done with this area, but that dragon looks mighty tempting to kill. Better to deal with it now than have to walk back here later for it.
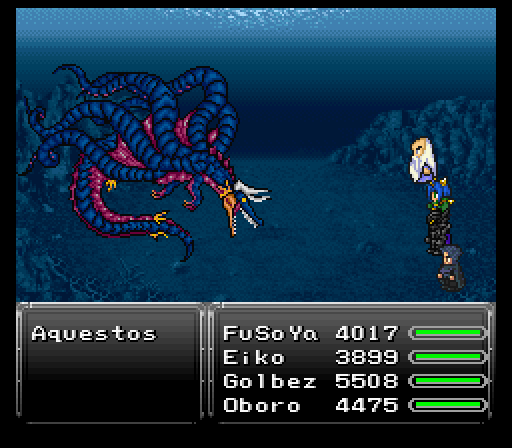
This dragon is one of the famed eight dragons unleashed when the world went into apocalypse mode, Aquestos. As the name implies, Aquestos is heavily attuned to water and opens with one such water based move, Tsunami. The way I'm geared up for this, Eiko absorbs water, Golbez & FuSoYa nullify it, and Oboro halves it. Basically, it and the other major water move it has, El Nino, pose zero risk to me.
Besides that, Aquestos like to "lower its strength". That's code for inflicting a bunch of ailments on itself, then attempting to transfer them to someone via Rippler. Nothing a Remedy & a casting of Dispel can't fix if it connects.
Aquestos really only has two potentially nasty moves in Lv3 Confuse & Lv? Holy (Hits anyone who's level is a multiple of the last digit in your gil total). Magnitude Eight seems like it hurts here, but that's only because FuSoYa's shield makes him weak to earth. Even then, he tanked that at full health.
Since Aquestos hates lightning, spamming Nova and other lightning based moves is best. If you come here at a low level, possibly right after getting the airship, it's best to equip as many people as possible with Aqua Coats to stave off all the water attacks and keep everyone in the back row. Very doable fight right after getting that airship though.
Aquestos has a Magic Tab to steal and drops another copy of the great Mermaid Tear relic.
Only Cloud's left to get back on our team and we know exactly where he is.
Phoenix Cave:
Time to go get Cloud who's searching the world for a way to bring Aerith back to life.
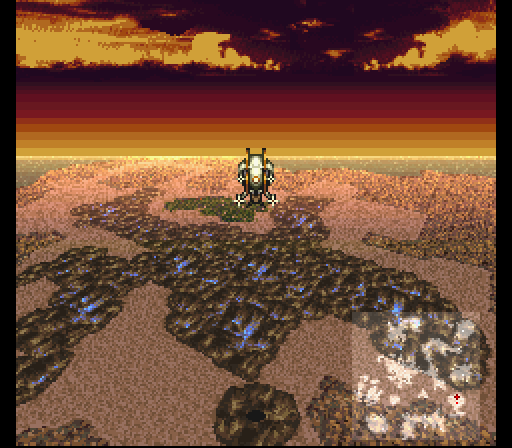
Finding the entrance to where he is can prove to be annoying due to the modified world map. However, the merchant at the base of Tyrano Tower dropped the clue to find that cave.
On the world map, head to the Orphanage where Arc was. When you arrive there, take a look at the nearby mountain. Seems peculiar...and it's made more apparent when you see a tiny portion of the mountain that looks different than the rest. This portion of the mountain is where you need to enter with the airship.
This dungeon, the Phoenix Cave, is easily one of the more dangerous dungeons to explore for two reasons. One, you have to split up into two teams. Two, the enemies are actually a fair bit more dangerous than the previous couple of areas. The main gimmick of this dungeon revolves around standing on a switch with one party so the other team can progress. Not much more complicated than that.
There are of course new monsters here, which are:
- Hetwan - Large, sentient insectoid aliens.
- Morbol - Grotesque, strange, plant-life beasts.
- Pyro Jack - A wandering Jack O'Lantern spirit that uses death and negative status magics. Becomes more dangerous if the last monster alive, with a chance to use Vortex, so you'll want to focus them down first. *Counters regular attacks with water spells.
- Rotfish - Undead fish that bite and excrete poisonous bile.
- Scrag - Floating creatures that shoot a Stop-inflicting slime attack. Uses 1000 Needles and Black Shock.
- Witch - Uses reflection spell trickery.
- Xenomorph - Lots of hp, causes instant death with its Cinderizer attack.
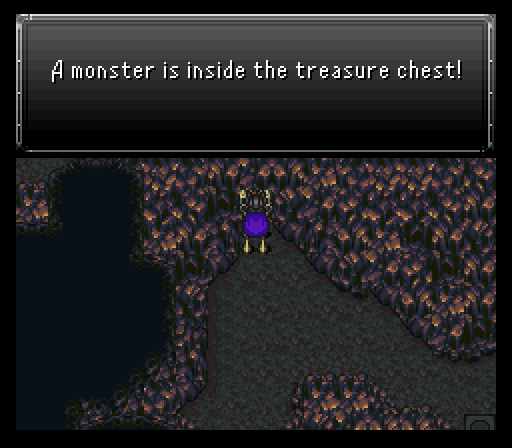
As for the treasure chests, unlike vanilla where very few chests actually had anything in them, every single one now has some kind of treasure. That includes the chest that you have to step on to a spike for in the lowest level of the cave. I knew this was coming and had my best team in mind just for this moment. Why? Because it's another boss monster in a chest, this time against Spiky Tiger's angry cousin Blue Spike.
Blue Spike keeps up with the theme of this dungeon being nastier than the last few by being a real threat itself. It opens with its special move Wreck 'n' Roll. This does very very high damage...and it uses it FOUR times to open the fight too.
Blue Spike's other moves are all water themed with Aquatic Breath & El Nino being its main attacks. Can do decent damage without water resistance, but not to the extent of his special move.
As long as you can get your defensive buffs up quickly after the initial rush, you should be able to weather the storm and drain away the tiger's only life. It does have a Blue Essence up for stealing if you find a chance to pull it off.
Once the boss is in its dying animation, I decide that everyone needs to select the Row command. After the boss fades out, it decides that it's going to pull off the quickest form-change ever and attacks as Hell Spike.
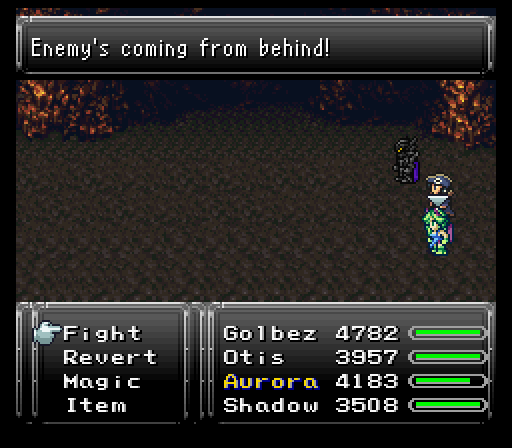
Hell Spike starts this fight as a back attack. Thanks to having everyone use the Row command before it appeared, there was no chance for it to capitalize on the ambush.
Hell Spike doesn't get to last too long, but its normal attacks are only slightly less powerful than Blue Spike's special move. Luckily, it trades out the brutal Wreck 'n' Roll for Acid Breath which does damage and poisons the target.
Hell Spike also has its own stealable, a Red Essence. Didn't get a chance to grab it because I killed it so quickly, but its drop makes it all the worthwhile to do this fight, Ronan's Tiger Claw weapon. Notable for having a sizable 5 point boost to his magic.
The rest of the cavern is pretty uneventful with both teams doing more standing on switches to let the other team proceed. At least there's a couple good items to pick up along the way.
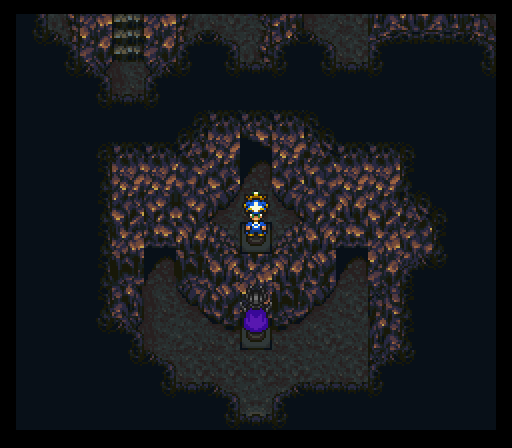
After having both teams stand on the switches to open the final room, take note of the dragon guarding a chest. I could probably take it down now, but I have to come back here again anyways.
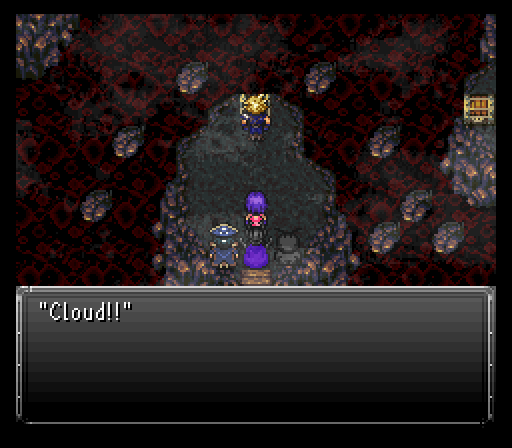
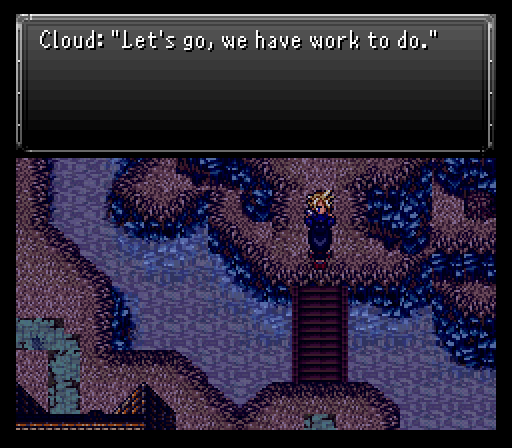
In the final room is, as expected, Cloud. He's found what will hopefully revive Aerith, then the team offers to take him back to her and doesn't let me CHECK OUT THE CHEST TO THE EAST DANGIT!!! We'll have to come back for it later.
On the plus side, the treasure brings Aerith back to life. On the minus side, it's only for a short while. Enough though for her to say thanks for protecting her when she needed it the most. Before she goes away for good, she wishes for the esper Phoenix to be reborn once more and give its power to Cloud.
After the scene, Cloud exits with Tifa, his mind at much greater ease. Of course, he decides to give it to Jasper one final time by stealing a bunch of items from him. Lots of high end consumables along with an extra Red Essence & Prism Cape.
With everyone back in the squad, there's just sidequests and some other dungeons to explore!
Aerith's ghost: If you go back to the hidden path behind Jasper's house, for a split second, just one time, you can see Aerith's ghost in her prayer pose next to a flower.