Part 25: Cave Hopping
Return to Fraust:
Time to see what's become of Fraust since the earth shattering kaboom.
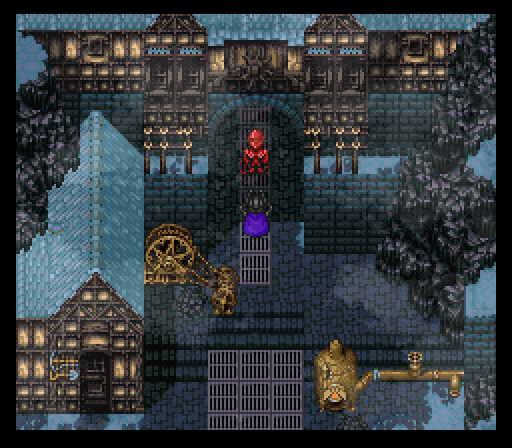
Upon entering, the music implies the town's fine...not! Move north and that theory gets tossed out the windows as a singular Bleeder attacks. Fraust has basically become a ghost town for the undead to prowl in.
Enemy wise, Red Beasts still being very capable of dishing out high damage aside, most enemies aren't supremely threatening. Besides that there's just Hellhounds. Makes for a great place to visit and gain exp & gil if you need a boost.
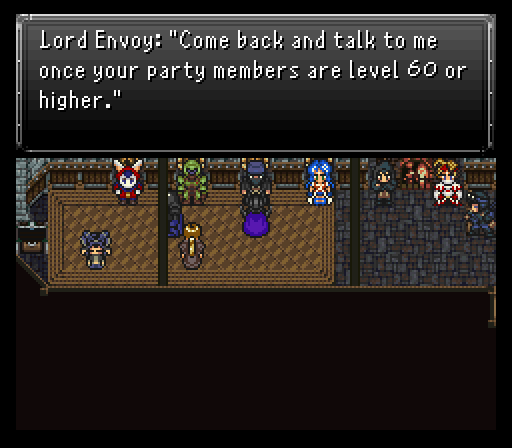
Despite the town being empty at first glance, there are some survivors, namely those in the Developers' House. Of interest is Lord Envoy, who if your party is level 60 or above will say you might be up to a real fight of sorts.
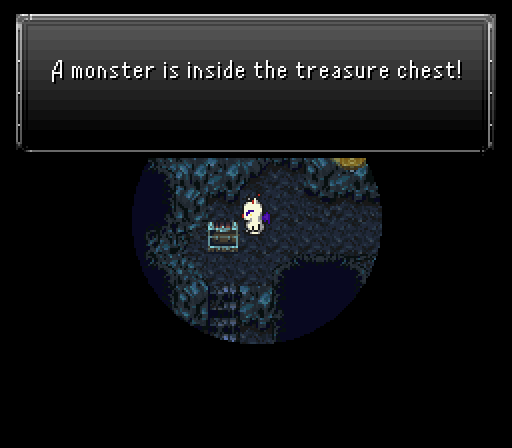
The Tonberry that was previous guarding a door will now move, allowing you to access a dark room with a Master Star & Necronomicon in the cabinet and a Quicksilver in the northeastern pot. The chest in the room has a boss fight in it, one that's allegedly immune to all damage, but one spell will break that barrier. Not that it matters at present since I want to get all my characters back before even thinking about attempting the fight.
My entry into town isn't through the front gates, but rather the secret passage once more. Inside, there are some new enemies than there was a year ago, in the Turbo Riders and Splicers, both of which move fast due to starting with Haste.
In the second part of the mine Imp Poes and Beholders make their debut. Nothing notable about either of them though, except that Imp Poes inflict Zombie. And then there's a rare encounter with an Ice Titan. They are indeed very strong, like a mini-boss of sorts, and are of course ice-themed, but have access to a couple other strong spells like Quake and Holy. It's special, Ice Crusher, can do around 2k damage or so.
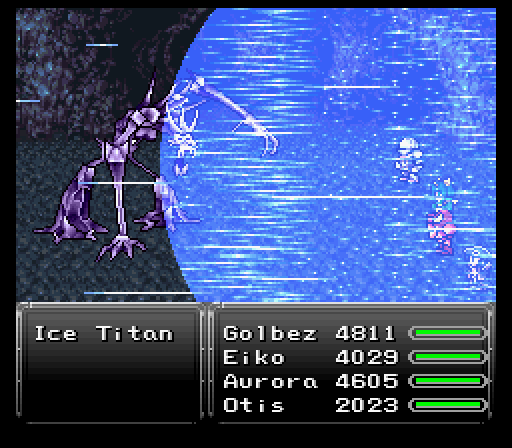
Once Ice Titan is reduced to around 10k hp, it will change its attack pattern up and use Frozen Tomb (freezes party members) and even Ronan's Blizzard Cannon. Once defeated, they can rarely drop Soma Drops, so keep that in mind if you ever want to farm them.
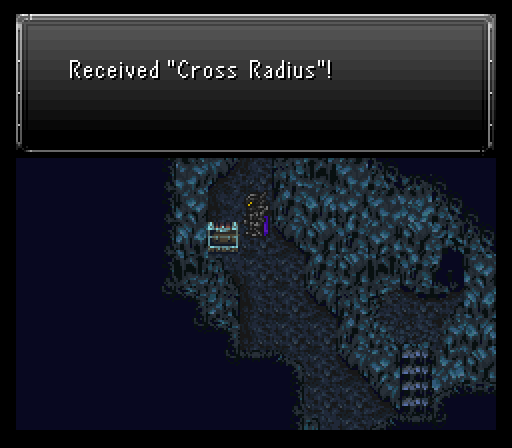
The rest of the old mines is pretty uneventful until you head back to the old moogle den. There's some...peculiar folks who've taken over the den, but the chest in the area has repopulated and contains a nice weapon in the Cross Radius. Good attack power and randomly cleaves an enemy.
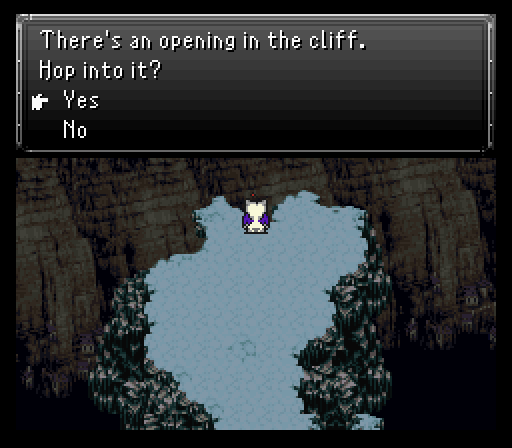
Once you've cleaned out the mines, there's one last place to go and that's back up to the snowy cliffs where everyone defended the esper. On the save point screen, take note of the dragon that's buzzing around everywhere. It's one of the eight optional dragons of the game and, while I could definitely take it down now, I want to get all my characters back first.
At the esper, make sure you have at least one or two good sources of damage dealing available. When you interact with our old buddy Vaalsparda, it decides to attack the party.

Vaalsparda's mostly an elemental spell using boss. By this time you should have plenty of armor options available that resist fire, ice, lightning, and/or a combination of them. That leaves only a few dangerous moves to keep an eye out for, Megazerk and Lullaby, which can more or less incapacitate the party if the proper relics are not equipped. If a party member does become berserked, then Vaalsparda will cast vanish on itself. And should a party member fall asleep, you ask? Well, Vaal will counter with its special attack, Frostbolt, which will Freeze the character solid. This boss is one smart cookie! If a character has Wall status, not only will it use Reflect on itself as well, but has a chance every now and then to use Anti-Reflect, which will remove Wall and give bad statuses to said character. Vaalsparda will also occasionally counter any character skill with Confuse, and after receiving some punishment can use Curara or Curaga to regain some hp.
Vaalsparda is capable of using a few higher-tier spells, however these will only trigger if you use either fire, ice, or lightning-based spells/skills against him. While he is weak to fire, the safest bet is to just launch any magic attacks that don't align with those elements and use defense-ignoring physical attacks (Lightsaber mainly). Vaalsparda should calm down without too much hassle.
The reward for the fight? Vaalsparda as a new esper and it's a solid one with Inferno, Nova, and Blizzard available. More importantly is the portion of the cliff where Vaalsparda stood disappearing, allowing you to access a new area that you need Mog for.
Heartless chronicles:
Eiko's stepped out and Mog's come in to take her place for the next cave adventure...and it's a reduced vision zone. If you have the Arkenstone from helping the soldier trapped in a snowman, you'll see its effects in action here.
Enemy wise, you need to be extremely careful of the Headcrabs since they love opening with Orb of Travel which can be extremely deadly by this point in the game. Considering they appear in groups of at least 3-4, it may not be a bad idea to Teleport out if you don't have enough AoE damage to burn them down quick.
Other enemies include:
- Icebinder - A basic ice mage who's special attack causes frozen status.
- Deathclaw - Physical attacks only. Special attack causes instant death.
- Tonberry - Rare encounter. Has high evasion and will use Step Mine or Break when hit by magic. If they step all the way forward 8 times it'll use an incredibly strong physical attack called Knife, then reset back to its starting position. Weak to fire and lightning.
- Chopper - Uses Mega Volt on itself when attacked to heal, and Giga Volt on the party when just one is left. Otherwise docile with only a small chance to attack with its special attack each turn.
- R-Series - Robo's evil brothers from Chrono Trigger. Buffs fellow monsters with either Big Guard or their special attack, Speed Burst (inflicts Haste) and uses Aerods on the party if last alive.
Tip: Equip the Flame Cloak armor to prevent frozen status.
Only a few treasure chests to grab here, but two of them have useful things (Omni Elixir & Misty Coat) while the third is monster trapped, pitting you against a trio of Tonberries. They can hit extremely hard and love countering with Death & Holy. Pick one person to do all the damage, ideally Golbez, and give them the Exodus Token (to block instant death) & Chaos Plate (to absorb holy, but anything that nullifies holy works too). It's worth it to use Hastega right off the bat and then summon Fenrir. Then Slowga on them. And if they get close enough to where they are going to use Knife, you can summon Ark to try and dodge it.
The Tonberries have the same steal & drop, Shaman Dresses. If you can get any here, great. Not a big deal if you can't though.
Eventually, you'll reach the last room that has a save point. After healing & saving, you can try to take the northern exit, but a Heartless stops you before that can happen and a fight with it begins.

Heartless...honestly doesn't do too much. It can hit fairly hard with its physical attack or special move Shadow Strike, but didn't seem to throw out any AoE damage. To be fair though, it is weak to holy and my Otis has a Holy Lance, Vambrace, and Dragon Horn equipped. Suffice it to say 9999 x2 or x3 damage adds up really fast, heh.
Normally, Heartless uses a lot of dark/posion and gravity spells, with a chance of using Charm on its fourth turn. Then after some time it will become invisible. After a few times of that, it'll use Blizzard Cannon. Once reduced to a certain amount of hp, it'll glow and use a Quicksilver, which gives it a bunch of hidden statuses, then pops an Elixir.
Heartless also has a massive amount of counters, where it has a 1/3 chance to counter every single sensible character spell with the same spell. So you may want to stay away from casting Meteor on it for instance.
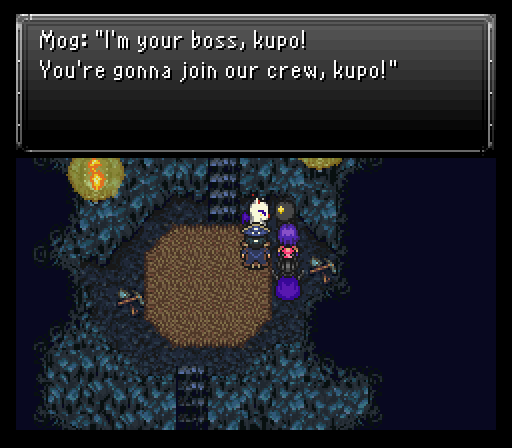
After the fight, you can talk to this special little creature. If Mog's in the team, he'll convince the creature, the hilariously named Shadow, to join the team.
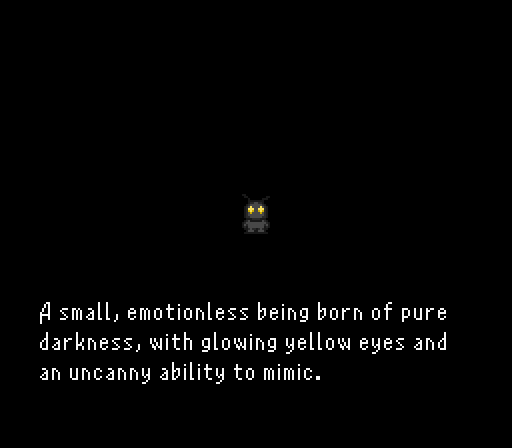
Shadow is an instant hit due to having access to the Mimic command, meaning he could mimic Eiko's summons for some pretty bonkers AoE damage. He's a pretty capable frontline fighter with some good weapon options and even a solid mage by having a spell list that contains every spell the others in his team know. Having access to moves like Curaga, Arise, and a bevy of high end offensive spells is insanely good.
What truly makes Shadow shine is that he can open the sealed doors in Fraust. Two of them are worth checking out which is the weapons shop and the house up the stairs directly north of the weapon shop. To save time, have someone cast Teleport instead of walking up the stairs to exit the cave.
In the weapon shop, there's an old man in a bed who hands over what is pretty much one of the best offensive weapons in the game, the Zodiac Sword. Powerful, good stat boosts, uses mp for automatic crits, and can proc Flare. Golbez is going to LOVE this weapon, believe me.
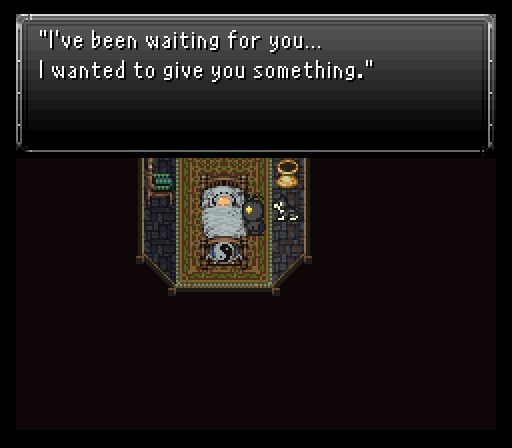
As for that house, it turns out an old friend of ours survived the zombie apocalypse, Astral. Talking to him will make him come on to the airship and...do nothing really. However, he still wants to help the team and does so via an item he hands over, the Astral Doll.
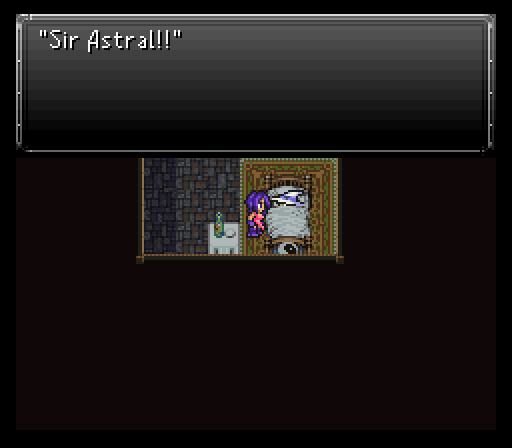
If you have a spare slot in your team and use this, it'll add Astral into the team. He doesn't have his outdated gear from early in the game, but rather a loadout that can very well let him brave the frontlines with little to no trouble at all.
Next time, we'll take Astral for a spin as we go to find one of the last three characters missing from our army.
Orc Cave:
Since I picked up that Astral Doll last time, I say we use it and see how our old buddy Astral holds up in combat now. Just need to make sure you have an open 4th slot on your team and he'll pop up when you use the doll.
Astral's commands haven't changed so he still has the rather shaky Inverse skill. Miracle though is really nice since he has crazy high magic so even a lowly Cure can heal 700 or more health.
On the offensive side of things, his Magus Rod is interesting. Big 7 point boost to magic, but more importantly has a chance to proc Ninth Dimension which does some pretty solid damage. Given that magic stat though, he's probably best off breaking the various elemental rods when he doesn't need to heal.
Thankfully, Astral's defensive stats don't lag behind in the slightest. Acceptable physical defense & evade, very high magic defense, insane magic evasion, and having multiple status ailment immunities thanks to his Aeon Crystal relic.
Now then, for the dungeon we'll be exploring today, we'll have to head to the Beast Plains on the east central part of the world map. There should be a singular cave entrance you can spot so save up before heading into the Orc Cave.
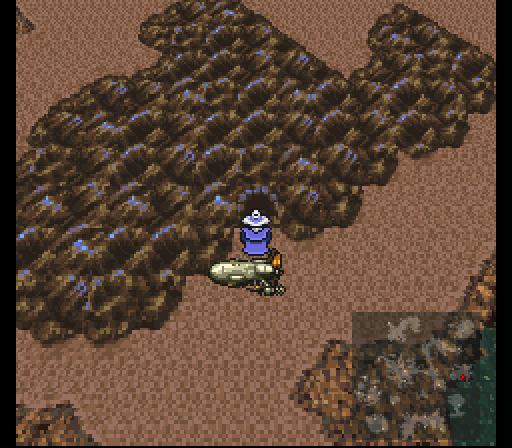
Once inside, a dog that may or may not be Ace runs up to us and barks, seemingly telling us to follow him. This place is basically orc country aside from Arzuros and Ultima Demon encounters, which we fought earlier on Mt. Etlich. There's Uruk-hai, Great Orcs, Berserkers, and a rare encounter. Uruk-hai aren't too nasty aside from having a penchant to use Shock Wave on whomever kills them, but Great Orcs can hit extremely hard. The rare encounter mentioned is an Abyss Dragon and is far more dangerous, so be ready should it show up. Golbez has 150 defense due to dual wielding, but one NORMAL attack from the Great Orc can lop off well over 3000 health from him. You'll want to focus down the Great Orcs first before they can start causing big problems with that damage.
The dungeon itself is pretty linear for the most part. There's a few chests, the first of which is well hidden off to the upper left area of the map and is a monster in a chest: Pazuzu.

He uses a lot of lightning and wind spells, with the occasional Death and Freezing Dust. After a certain amount of time he will spam Atomic Ray, which can be quite lethal if not prepared. He is weak to holy elemental. Defeating him will give you a unique weapon for Cloud, the Apocalypse. Has good attack power, gets stronger as his hp falls, and randomly casts Meteor.

Tip: There's a group of mercenaries huddled around a fire, if you talk to each one of them, and then talk to their leader again, they'll offer to clear out the monster for 20,000 gil. If you say yes, there will be no more random encounters until you leave.
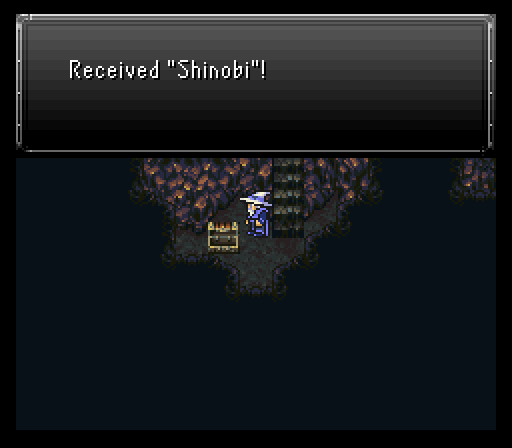
The chest you absolutely need to grab is the one in the room with a switch you need to hit. That chest holds the Shinobi. A decent weapon with a chance to instantly kill, but its true use will come into play after this dungeon's complete.
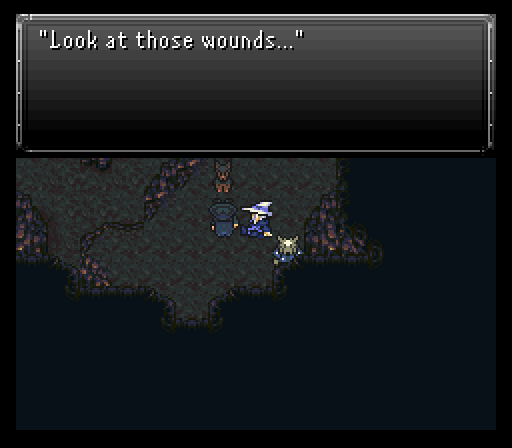
On your way to the save point, you'll see Oboro who's getting to know the floor quite well while his trusty dog sidekick is at his side. After reaching the save point and heading out to check on him, the reason he's on the ground comes out of hiding and jumps the party.
Drakkaul's a Behemoth that gets a back attack on your party. He has the hilariously named Fartillery which inflicts sleep. It also has strong physical strikes it likes to chain combo with up to four times in a row, can cast Death to instantly slay a target, or can cast Ninth Dimension for ~2k damage to a target. He will only attack four times in a row, however, if a target ally is asleep... so try to keep everyone awake.
Other notable attacks are Cursed Breath, which can inflict many bad status effects, and Death Pact, which is a shorter non-blockable condemned to allies. He negates water, and absorbs ice. Fire & poison are his weaknesses.
Drakkaul falls like a ton of bricks, but not before a Bizen Boat is stolen from him. He drops a new armor, the Yeti Suit, upon his defeat. Interesting armor with good defenses and, as the name implies, changes your wearer's sprite to that of Umaro.
After the fight, the team takes Oboro to Lunaris. One flashback scene with Oboro later where it's heavy implied that he is Eiko's father, you gain control again and can leave the town.
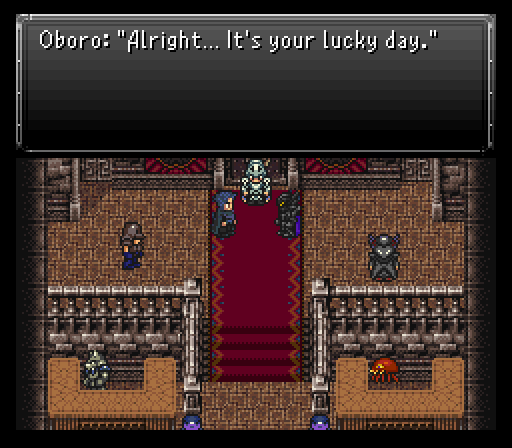
Before the segment ends, we're going to take that Shinobi to the coliseum and bet it.
It's a shame the killer boss theme from Treasure of the Rudras called The Flame and the Arrow only gets to play for a few seconds cause somehow Oboro made his way here ahead of us. Golbez kindly bitchslaps him into reality to get the Shinobi back...as well as Oboro rejoining the party.
Only two more party members to locate now. We'll be getting both of them first before tackling the remaining optional dungeons in the world so stay tuned.