Part 18: Takin' Care of Business
Sidequest tour:
The world's in grave danger of taking a planet-shattering kaboom... So what do we do? Cleaning up some loose ends for two segments and training to prepare for the inevitable massive battle to come, that's what! At this point many NPCs in the various towns will have new things to say about the current circumstances, should you feel like revisiting them. Our first stop on the tour is a place where we just came from...the Solace Cavern.
Back inside the room where we found the espers, there was a rather hard to notice chest that we couldn't get at the time. Well, we can now and it contains a prized Quicksilver.

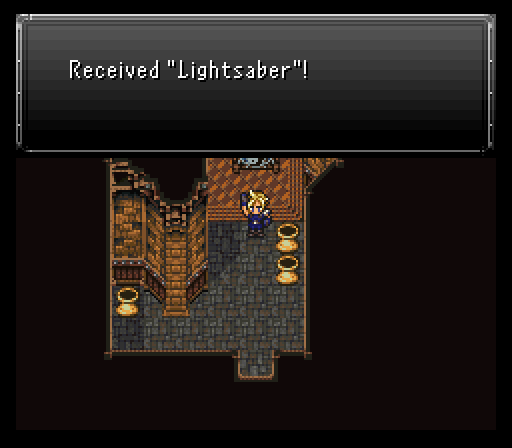
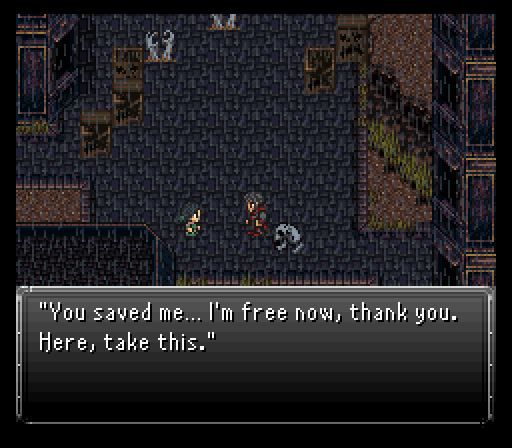
Now up on the loose end cleanup project is the Hermit's Hideaway. The esper turned old man here realizes the world may be doomed, but he's going to do one last act of kindness to help the team turn this around. He turns himself into the same weapon Leo wielded, the Lightsaber. This weapon seems to have max attack power, but its damage is actually dependent on the user's current hp level.
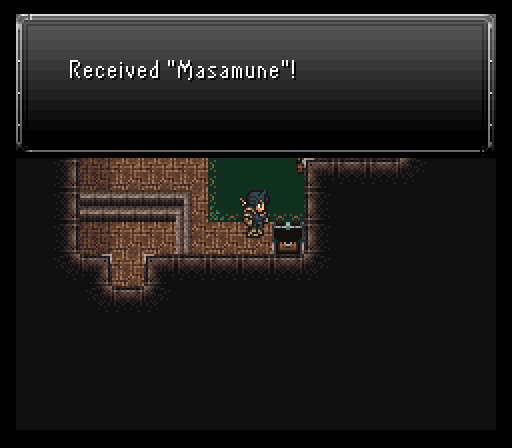
Next, back to Mist Castle, Avalon's home. We haven't been here since the imperial army vacated the area and there's some good treasure to pickup. There's a Quick Ring (+7 speed, +20 evasion) in the storage room, but the real treat is the chest in Avalon's room containing a Masamune for him. It's a wind elemental katana with +2 to might & stamina, +10 to evasion, and can randomly replace the physical strike with the AoE wind-aligned attack Wind Slash. Really nice for softening up randoms...and it'll be possible to bet for a second one without too much hassle to boot.
Next up on the cleanup tour is a return to Lunaris. There's a curious stump to the south of Leo's grave that can be interacted with, but nothing of interest happens. There is a fellow by the name of KlaTu by the inn who seems to know a secret FuSoYa's hiding. Evidently dealing with Zuriel wasn't all he was doing. He was also searching for a very special beast who felt like roaring on occasion and asking for a meal of Super Missiles. FuSoYa's hunt was none other than Super Metroid's own Kraid. The beast lives on Zebes Isle which has been submerged for quite some time.
...You know, I'm not sure what's more crazy here...FuSoYa hunting down a beast from a different game or the fact its implied Kraid's alive, but underwater. Soon enough FuSoYa is going to have to realm hop into the Megaman X universe and blow up a maverick just to keep up his image, heh.
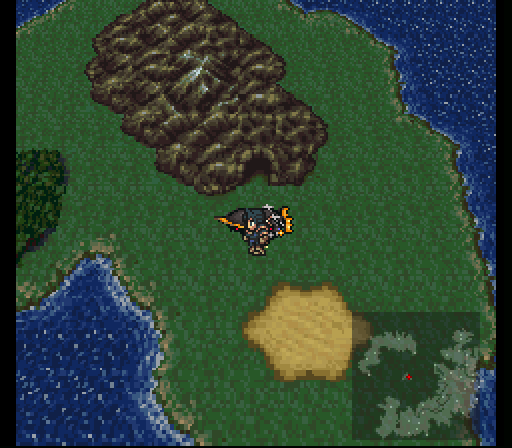
Anyways, the next stop on the world tour is the triangular island in the middle of the world. The mountains have now opened to reveal an entrance into the Pirate's Hideout, a short four screen dungeon where the only loot is at the end. You do want to come prepared for battle though since there's some new enemies about.
New enemies:
- Banished - Uses Drain and its special attack sets condemned status.
- Grimer - The slimy, amorphous Pokémon causes seizures.
- Steelpion - Can petrify a target and love to open by doing just that on a target. Prevent this by equipping Holy Amulets.
- NigiMitama - Shows up in a rare formation with a Hothead and a Fiend. They use an abundance of different spells, including Reaper's Dark Force. Worse they counter every skill besides Magic with Black Shock.
Outside? Red Beasts hit MUCH harder than anything else encountered thus far and Klarrgas have a new Arcane spell for FuSoYa to learn, Aero. Wind damage to all which is quite nice since that element is rather rare to find in a spell or even weapon right now. There has to be just one Klarrgas remaining for it to use the spell.
- Flyclops - Rare Encounter. Rather puny...but can petrify if there's one left.
- Klarrgas - They have a considerable amount of hp, hit hard and use either Cyclonic, Aero, or El Nino if last alive. Can steal Reflect Rings from them.
- Phantom - Is undead. Can use Freeze or Soulshatter on its second turn.
- Red Beast - Uses mainly (very) strong physical attacks. Have the characters in the back row, equip a First Strike relic and Summon Vysage if possible to counter this. Or summon Ymir as they're susceptible to petrify.
Just before another cave entrance is a dwarven Quizmaster who, if you choose to, will test your knowledge. Should you answer his questions correctly, the party will receive a level up. Should you fail just one, you will loose. Either way he will be gone forever after this, so answer wisely.
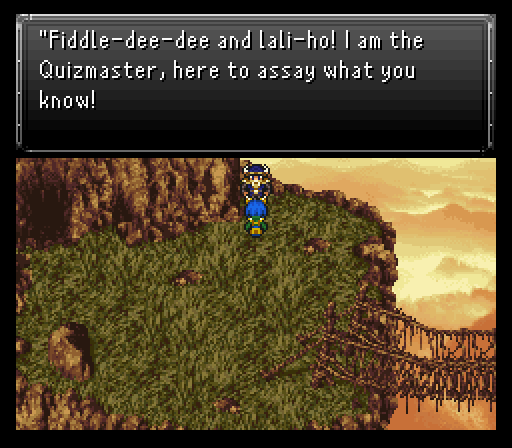
The answers to the quizmaster's questions are:
- 1. #1
- 2. #3
- 3. #2
- 4. #3
- 5. #1
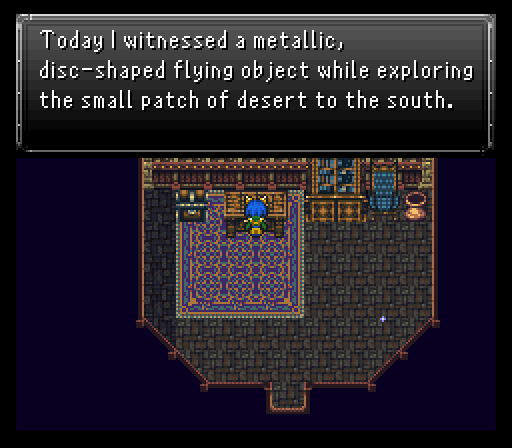
The next cave is full of Bleeder zombies. As a pack of four they give decent exp and are quite easy to defeat, which makes this a good place to gain levels if need be. Then at the end of the dungeon is a room with a save point. There's a journal talking about the Cute UFO in the small patch of desert along with four items. One is in the pot, two are in the cabinet, and the last in the chest. In total, you'll walk away with 17.2k gil, a Golden Apple, a Necronomicon, and Otis's personal relic, the Shipwrecker. This changes his Jump command into Cannon which lets him deal damage based on his level to one or to all targets. Bear in mind the damage will be divided for each enemy targeted beyond the first.
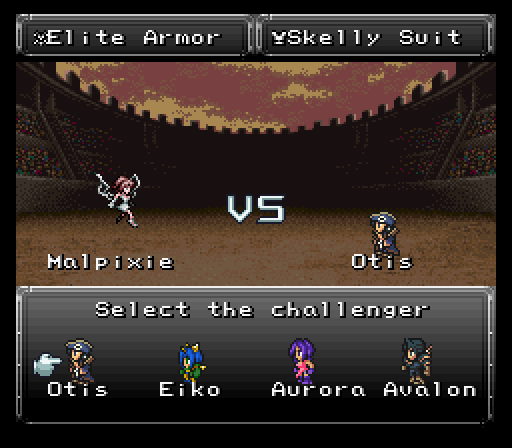
Finally for this segment, Otis is going to go a round in the colosseum and bet the Skelly Suit for an Elite Armor as he goes up against a Malpixie. He'll need a Reflect Ring to bounce back the fatal Blizzard casts.
The Malpixie, besides Blizzard, can use Frenzy Eye to inflict berserk which is fine since that helps Otis hit even harder. It can use Gravity though and that bypasses reflect to do very heavy damage based on the target's remaining hp. It can't kill, but it'll leave the target low enough to be easily finished by a physical right after.
I also bet a Vendetta to start the chain of prizes up to getting a Demon Killer sword. A Galaxy Scarf to get to a Diamond Helm. And a Gold Armor to get to a Crystal Mail.
Vendetta>War Machete>Angrist>Demon Killer
Gold Armor>DiamondArmor>Crystal Mail
Galaxy Scarf>Rune Circlet>Diamond Helm
Optional boss beatdown & arena shenanigans:
Back to Rogue City, two things left that I can do are here and both are boss fights of the optional variety.
First up, there's the Master Tonberry. If you don't have four Reflect Rings, go buy them and equip them all on your team. Hell, bring along Eiko too and give her Sylph. Water resistance or absorption is critical too which you can get from Aqua Gears (absorption) or Elite Armors/Prism Capes (resistance).
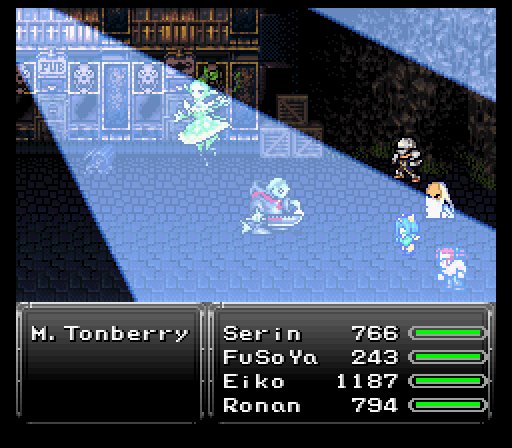
Master Tonberry has a pretty simple to understand attack pattern. It'll begin by using Barrier Change to switch around its elemental resists & weaknesses, then start using a spell attuned to the element it switched to like Inferno/Blizzard/Nova for fire, ice, and lightning respectively. Sometimes it'll use a physical strike instead of a spell which, while painful, isn't hard to heal up.
Also, as per usual Tonberry tradition, it'll waddle ever so close to your team. Once it's right up next to your team, it'll use Cleaver and basically one shot whomever is targeted before returning to the back of the battlefield. This can be survived if the user is in the back row defending with a Protect spell cast on him/her.
The worst elements for the M. Tonberry to swap to are wind, earth, holy, or water. Wind brings along Gravity, earth has Quake, holy has Saintly Beam, and water has El Nino.
While Scan does help in figuring out what element its weak to, there's another way that doesn't involve it. Master Tonberry will be weak to the opposite element it switches to. Fire & ice oppose each other as does holy & poison. The other elements...managed to throw me for a loop as to what opposed what for a while.
If you don't have an attack available for an element, just hit the bugger once and it'll switch it up.
Eiko's pretty much the only reason I can do this fight now. With Reflect Rings on everyone, she's my only source of mass healing via Sylph summon spam. FuSoYa has White Wind if you need to double up on healing (which I would have taken had I remembered that I had it, heh).
Steal wise, there's an Omni Elixir up for grabs. Nice, but hardly worst risking your life for unless it's the very start of battle. The drop though is very nice, a Demon Killer. No special attributes, but it has the highest attack of any weapon to date.
Treasure: Search the box behind where the Master Tonberry was standing to find a Quicksilver.
Next up on the optional boss docket is a mechanical monstrosity hailing from Bioshock, the aptly named Big Daddy who decided to jump me before I was ready to show my setup for the fight.
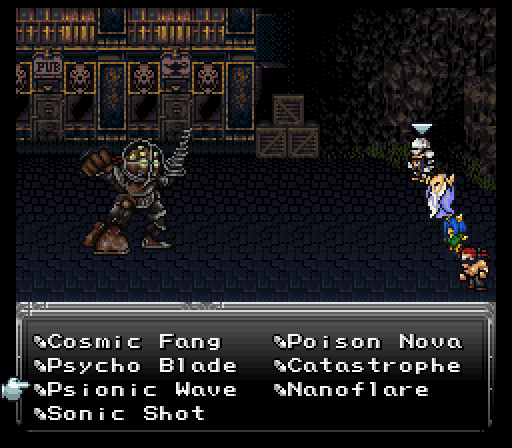
Big Daddy opens with Scintillation to blind the party, but honestly, nobody should be in the front row because despite being sixteen levels lower than Master Tonberry, the robot hits MUCH harder on the physical front. Drill Stab is basically fatal to any low defense targets.
On the non physical skill side of things, it has Scatter Missiles (multiple % based damage strikes against randomly chosen targets), Wave Storm (AoE, but Rubber Shields nullify this easily), Toxic Bomb (Annoying, but it doesn't one shot anyone at least), Atomic Ray (Heavy AoE fire damage. Brining Prism Capes and/or Ashen Cowls helps immensely), and Shrapnel Blades (Basically fatal if it's focused on a single target).
Healing at least is much easier here since you don't need Reflect Rings equipped. Just need to be ready to revive since the robot can and will instantly slay a target if it chooses, especially with Shrapnel Blades.
Serin has one task to do in this fight, and that is to use Psionic Wave to force a weakness. Fire, ice, or lightning are the best ones to get.
The rest? Heal as needed, but throw out attacks if they've got any spare room.
The drops here are a Scrap Metal, then a key item that's called Incinerate! after the battle concludes.

Tip: Talk to the little girl NPC after defeating the Big Daddy and she'll give you a Wrath Band.
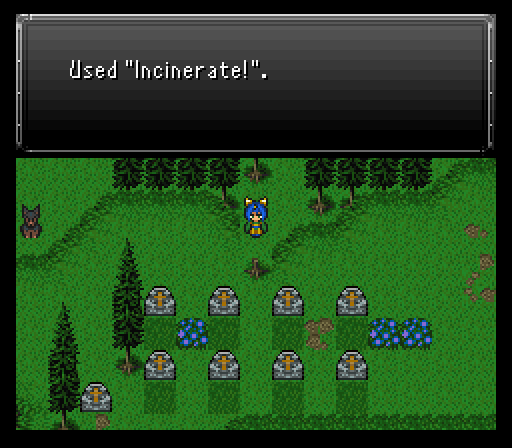
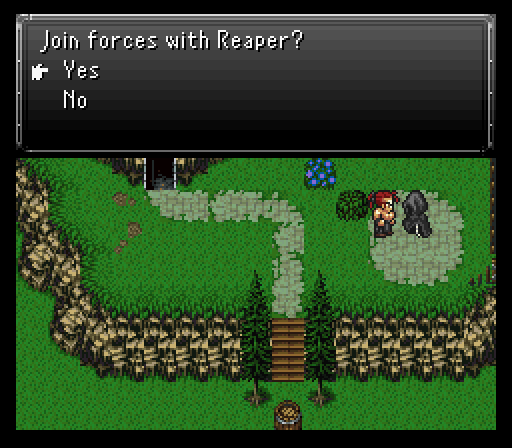
The Incinerate! can be used on that stump in Lunaris to clear the way. Several graves have items to grab, but the real reward is a relic hidden behind a door, the Lavos Shard. Tons of stat boosts and also raises max hp & mp by 25% each. Besides a Golden Apple inside a barrel, you'll also find Reaper pacing around the area and can choose whether or not to recruit him into the party! Bring him on over to the Beast Plains for a while to do some easy Souls-farming.
Last but not least, way back in Ronan's scenario we briefly encountered a mermaid...well, now we can go back there and meet her and be gifted with a Mermaid Tear for doing so. It is a very nice relic that grants regen, protect and shell. It absorbs water element, has no effect to fire, 50% absorbs ice, but is weak to lightning.

The most efficiant way to get it is to park the airship outside the Star Mountain cave, jump into the Zolom Trench, meet the mermaid, then walk out of Kaldor Trade City southward across the bridge, then past the Imperial camp, go through Deadwood forest, jump down Eternity Falls, and you'll back on the Beast Plains to retrieve the airship.
Next, we head for the floating island in the sky to defeat Kefka/Zuriel and save the world.